You will first need to upload the Xero Rest Service by following the below instructions:
- From the main Navigation Menu > Maintenance and then REST Services.

- On the REST Services page, click the Import Rest Service button.

- This opens the Import Rest Service window allowing you to upload the Json File linked here.

- After you have selected the file, you can press the Process Import button.
Now you can add the connector by following the below instructions:
- On the left side options column click Connections.
- On the Connections page click on the Create Connection button.

- On the New Connection page click on the Xero icon.

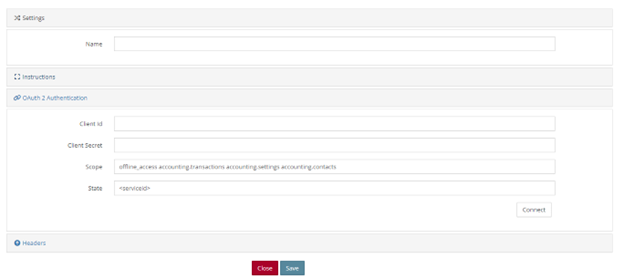
- The page to configure the Xero connection opens.

- Create an OAuth2.0 app and make sure you select the “Auth Code” grant type. Your app is assigned a unique Client ID and you can then generate a Client Secret. The Client Secret is private and should not be shared.
- Enter the Client ID and Client Secret into the Authentication Section and click connect.
After Authentication, we need to retrieve the Tenant ID.
- Create a new Data Source > Bulk Data Sources > Query
- Select Xero Data Source
- Select your Connection > Setup > Connections (See Screenshot)
- Click Preview and copy the value in tenantId

- Go back to the Xero Connector
- Expand the Headers section
- Replace the Xero-tenant-id with your value.
- Save the connector.