
If you run NetSuite integrations through SmartConnect, there are a few changes you should know about, both on the NetSuite and SmartConnect side. We covered the NetSuite connector this week on New SmartConnect Office Hours. If you’d like to watch a video explaining this update, see here:
SmartConnect and NetSuite
Everything SmartConnect does with NetSuite is built so users don’t have to write code themselves. For example, we handle how we connect to the system, rate limits, and custom role types and fields. Behind the scenes, SmartConnect supports several of NetSuite’s APIs:
- OData REST API: the primary, standard method
- SuiteQL: ad hoc SQL-style querying
- RESTlets: used for saved searches and advanced functionality
- SuiteScripts: dynamically deployed for real-time triggers and functionality not available through the standard APIs
This range lets you hand everything from a simple sales order creation to complex, fine-grained scenarios like item-level tracking down to a specific bin location.
What’s Changing?
On the NetSuite side, they are making a few changes to SOAP API support and authentication requirements. SmartConnect has made updates to the NetSuite connector to bring some new tools to tackle these changes.
OAuth 2.0 is Now Required
Token-based authentication is being phased out in favor of OAuth. NetSuite offers two OAuth options.
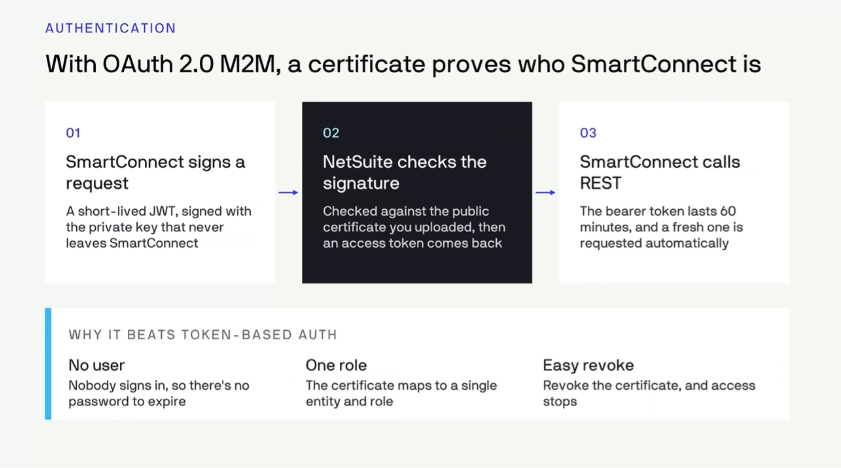
- Machine-to-machine (M2M) OAuth: This is certificate-based and doesn’t require frequent reauthentication. SmartConnect uses this method, and it’s the one NetSuite recommends.
- User impersonation OAuth: This is tied to a specific user’s access, with short-lived sessions that require reauthentication every few days.
M2M works via a JSON Web Token (JWT). SmartConnect generates a key pair, keeps the private portion secure in its own database, and you upload the public certificate to NetSuite. Each certificate maps one-to-one with a single connector and integration record, so revoking access later is straightforward.
OAuth is already available in the new SmartConnect version, so even if you’re not ready to move from SOAP to REST yet, you can still adopt OAuth 2.0 ahead of NetSuite’s deadline.
SOAP API is Going Away
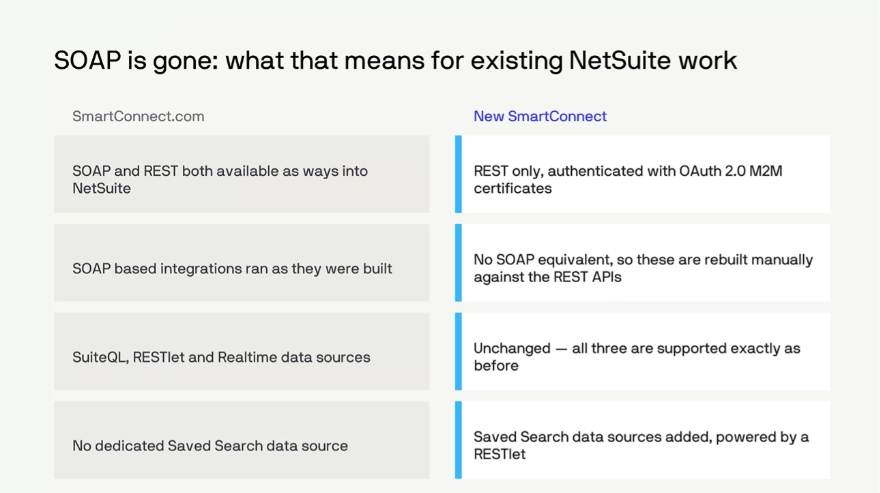
NetSuite is retiring the SOAP API, and both NetSuite and SmartConnect will be moving forward in a REST-only direction. This means if you currently use SOAP, you can keep using it in your existing SmartConnect version until NetSuite officially retires it, then integrations will have to be rebuilt.
If you’re on SOAP, we recommend treating this as an opportunity to evaluate your existing integrations rather than copying them over as is. You should:
- Decide what to keep, what to adjust to match current business needs, and what to replace or retire.
- Consider whether integrations built on ad hoc queries or SuiteQL might work better as saved searches going forward (or vice versa).
- Reach out to your account manager to walk through your specific environment and migration options.
A SmartConnect MCP integration is also in development, which is expected to help transform SOAP integrations into REST ones with AI assistance. You could also rebuild them manually, too.
Setting up an OAuth Connection
Setting up a NetSuite connection is very similar to how it was before, except that the user-access portion is no longer required. Here’s how to set it up:
- In NetSuite, enable the SuiteCloud REST API and OAuth 2.0.
- Create an integration record configured for M2M authentication, with client credentials enabled.
- Set up a role for SmartConnect to use. At minimum it needs REST web services and OAuth2 access, plus whatever record permissions it needs (which entities/transactions it can see, which reports it can run, etc.).
- Generate a certificate from within SmartConnect’s connector setup — this downloads the public portion of the certificate to your machine. (The private key never leaves SmartConnect’s database.)
- Upload that certificate into NetSuite, using the certificate ID SmartConnect provides to keep track of it.
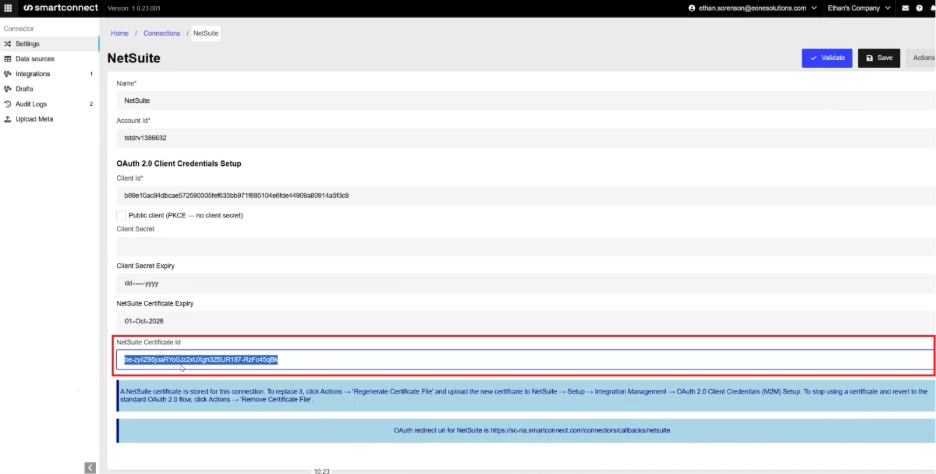
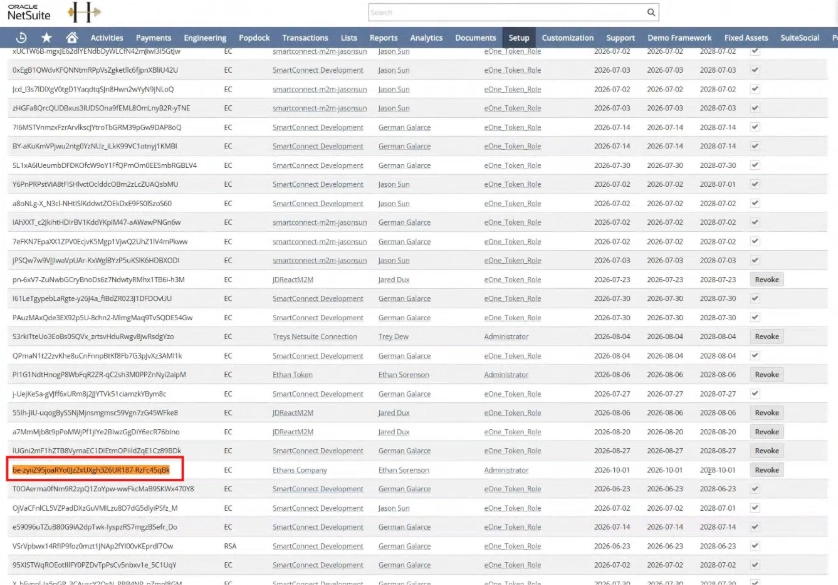
Within the connector setup, you can choose PKCE user impersonation, or leave it unchecked to use certificate-based M2M authentication. You can also find and revoke certificates in NetSuite by going to Integration > End-to-End Setup.
Refresh Metadata
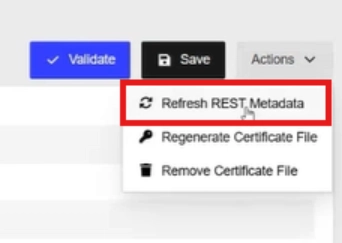
Once your connection is set up, you can refresh the REST metadata at any time from the connector settings. For large NetSuite environments, this can take up to 20 minutes, but it now runs asynchronously, so you don’t have to wait on it. You’ll get a notification once it’s done, and you’ll also be notified if a connector stops working.
Data Sources
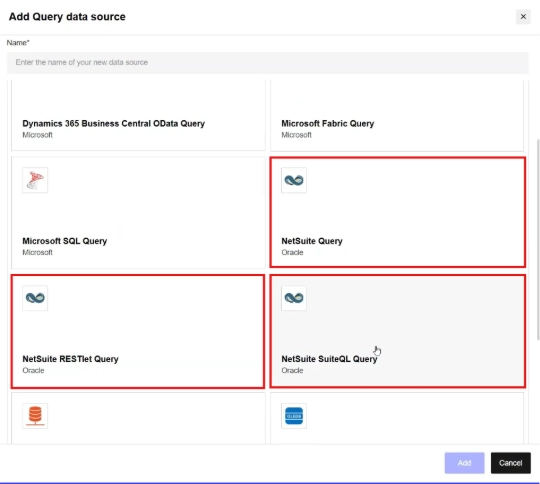
When building a NetSuite data source, you have three options:
- RESTlet: requires a companion RESTlet, but lets you run saved searches through the query
- SuiteQL: flexible, but requires knowing SuiteQL syntax
- NetSuite Query: built on the OData API. You choose your record type, filter conditions, and can even include child lines for more detail.
Logging
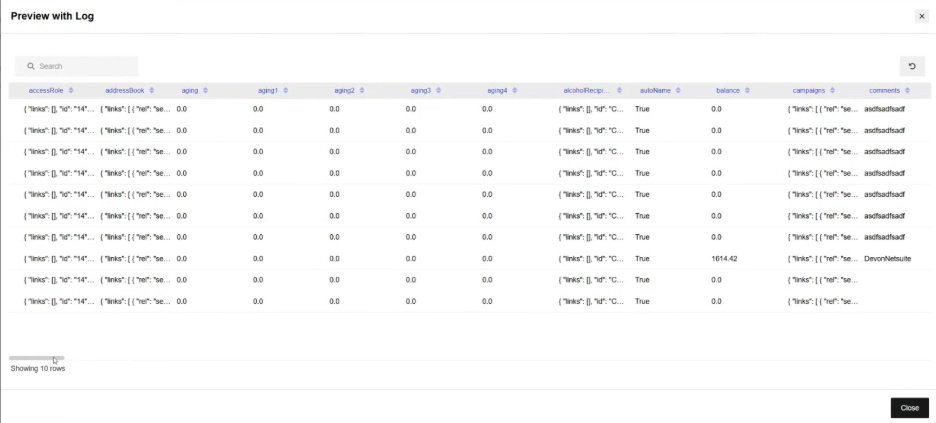
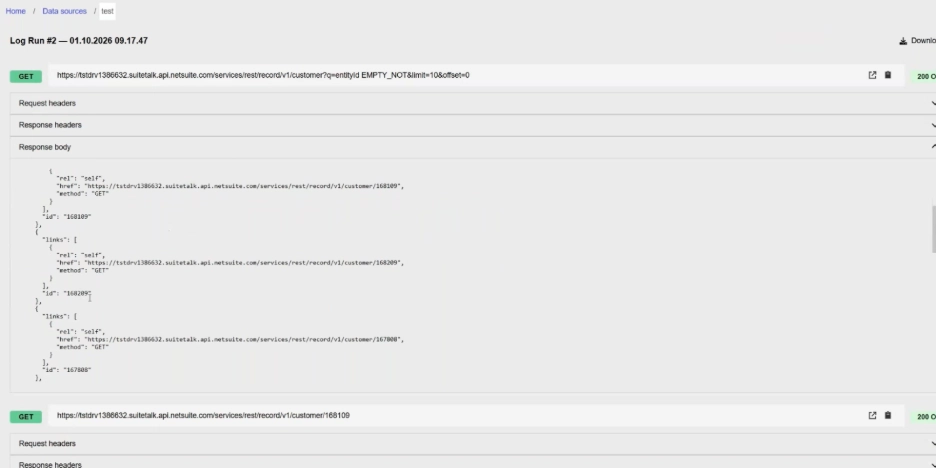
Every query now supports a preview with log option. Running a preview will show you the requests made, the response received, and why a query did or didn’t return what you expected.
NetSuite’s API doesn’t support a single combined search-and-expand call, so SmartConnect requests each record’s ID first, then expands each one individually. This makes the NetSuite Query option less efficient than SuiteQL or Saved Search for large data pulls, and is better suited to smaller, quick lookups.
Change and Real-Time Data Sources
Change data sources work the same as before:
- Select your connector and record type (e.g., Customer).
- Choose the date field to track changes by (Last Modified Date is the default, but you can track other fields like status changes to reduce noise).
- Set a default start date.
- Specify your NetSuite account’s date/time format. SmartConnect handles the format transformation for you from there.
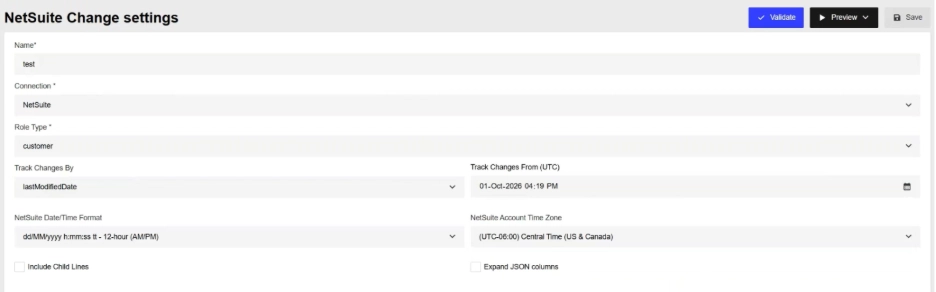
After the initial run, each integration manages its own date tracking independently, so multiple integrations pulling from the same source won’t interfere with each other.
Real-time sources work identically to the previous version. You select the object and fields to track, and SmartConnect deploys a SuiteQL or SuiteScript trigger that kicks off the integration automatically when a qualifying record is created or changed.
NetSuite Destination and Field Mapping
When setting NetSuite as a destination, only NetSuite REST is available as a target type. Select your connector and any standard or custom role types. By default, the base record (e.g., Customer) is added.
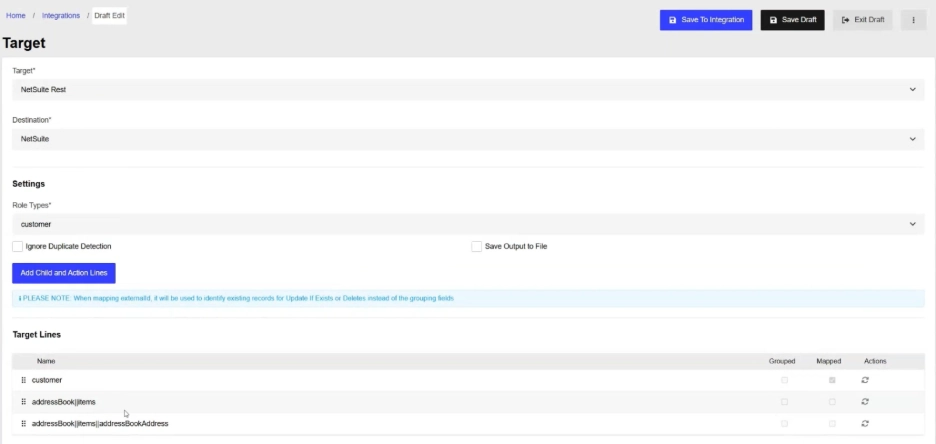
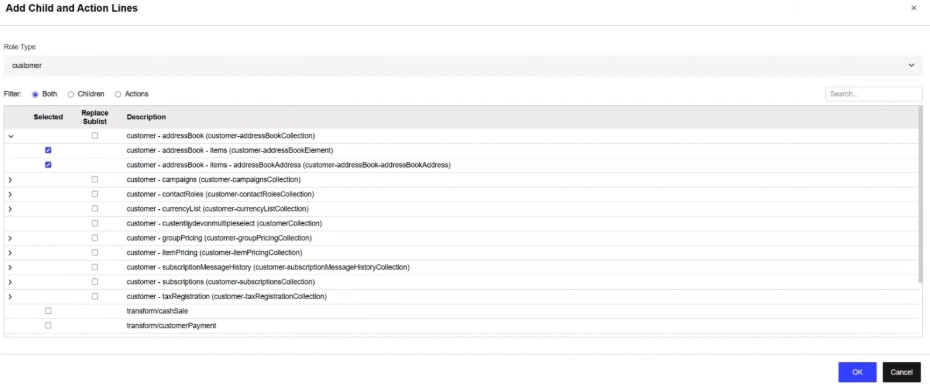
Use Add Child/Action Lines to bring in related data, like address book entries, transformations, or contact roles. SmartConnect automatically handles relationships between parent and child records.
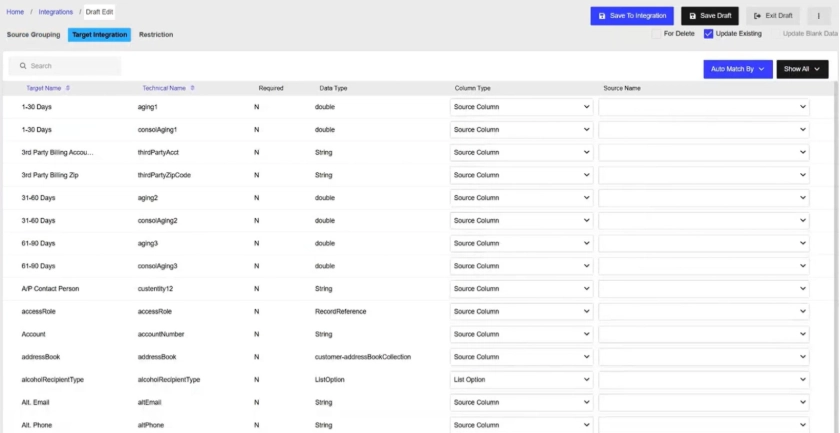
Select your source field and choose the destination field it maps to. Field lists load in automatically. List-type fields automatically load their valid options, and you can map, remove, or review currently-mapped fields at any point. Child records follow the same mapping process as any other source-destination pairing in SmartConnect.
Log External Requests
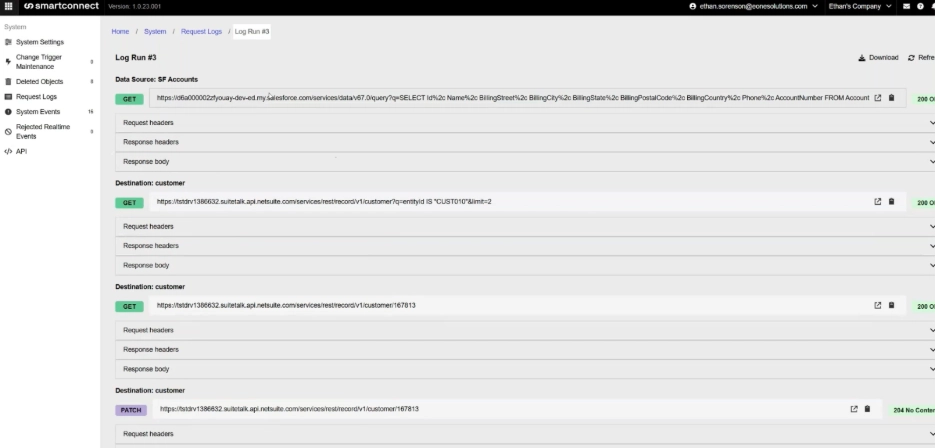
Once your mapping is complete, save and run the integration. With external request logging enabled, you can see:
- Each outbound request to the source and destination systems
- The data returned at each step
- Whether records were matched, created, or updated, and the response codes returned
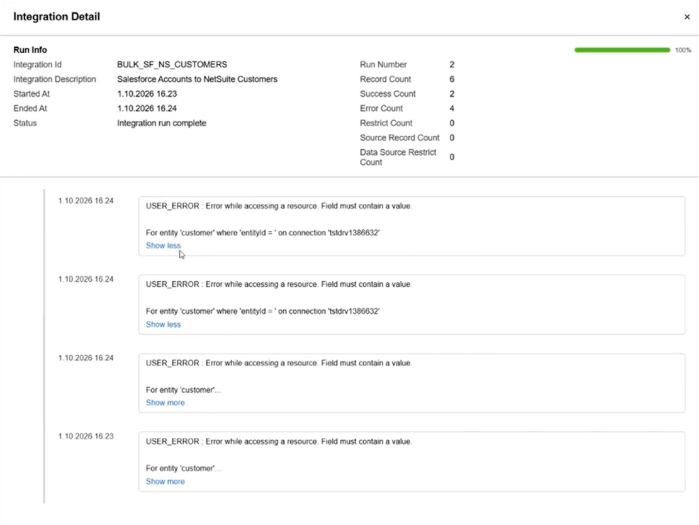
This is especially useful when multiple integrations are running simultaneously. Native system logs can get mixed together, while SmartConnect’s request log keeps each integration’s activity separate and easy to trace. This makes it easier for you to see and troubleshoot errors.
Additional Columns
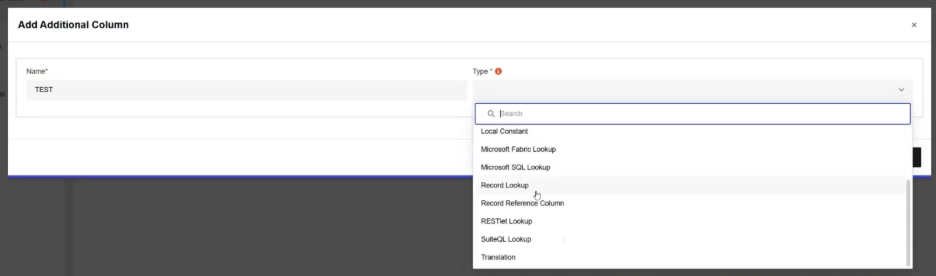
A few additional column types are available for more advanced scenarios:
- Record lookup: look up a record in any table, with filter conditions that can now reference local constants and global variables.
- Execution mode: Choose whether a lookup runs standard or is nested within a script, enabling more advanced lookups and calculations based on the result.
- Cache level: Caching a lookup at the integration-run level means it’s only looked up once per run rather than once per record, significantly reducing API calls.
- SuiteQL lookups: Bring in source columns and global variables, with built-in helpers for simple calculations, plus the full field schema loaded in for flexible querying.
- RESTlet lookups and record reference columns: Record reference columns let you pass a foreign key directly into NetSuite without first looking up the internal NetSuite ID, since NetSuite resolves it automatically.
Sign up for New SmartConnect Office Hours
Make the most out of SmartConnect’s updated NetSuite Connector and get ahead of NetSuite’s platform changes. Reach out to our team if you want to explore these changes more or talk about how this will affect your integrations.
If you haven’t signed up for New SmartConnect Office Hours and want to learn more about some of the other updates included, it’s not too late. Upcoming New SmartConnect Office Hours include:
November 5: Using New SmartConnect with Dynamics GP
November 12: Using New SmartConnect with Shopify
November 19: Using New SmartConnect with Dynamics NAV